Cel-Shading Explained Visually
By Konstantin Khanyants
Here's my explanation of real-time Cel Shading. Before I start, here's the link for the confusing explanation of cel-shading, and the link for the OpenGL code from that article. If you want to experience cel shading first hand or examine the code then download Loony by Jeff Lander.
Now for the explanation. After analyzing the article above and the code for it I have come up with what I hope is a simpler explanation that approaches the problem from a more mathematical/artistic perspective than a coding perspective. Although the explanation uses some trigonometry, you should be able to understand what's going on just by examining the pictures.
The Lighting Equation
The lighting equation (or pixel_color) for a single pixel on the screen when drawing a cel shaded polygon is:
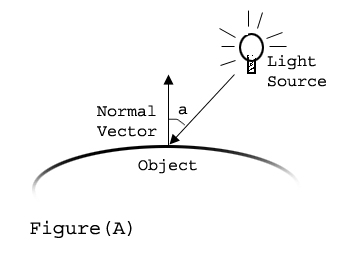
pixel_color = texture_map[(N dot L)]
where N is the Normal vector to the polygon, and L is the ray from the light source as shown in Figure (A). The dot product between N and L is the cosine of the angle between them, which we use to index the texture_map.
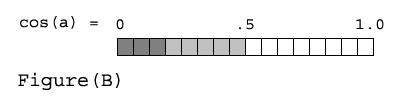
The texture_map is a strip of 16 colors as shown in Figure (B). The dot product provides the index into the texture_map to get the actual pixel color. Figure (C) shows the colors of the texture map that correspond to the various angles between the N and L.
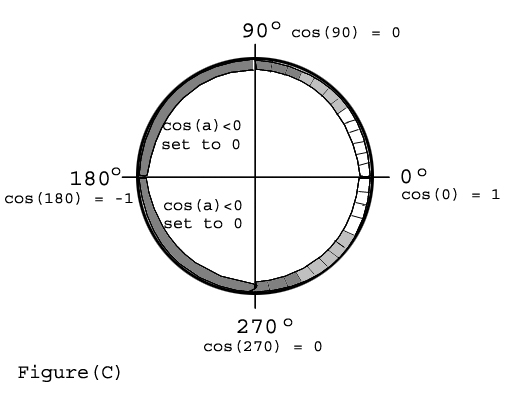
Under the rules of cel-shading negative values of cos(a) are set to 0 which is the index of the first color in the texture map which is the darkest grey. This happens when the polygon faces away from the light. If the polygon faces the light, then the shadow color is in the range of 0.0 to 1.0 which creates a gradation according to the texture map. For example, if the light hits the polygon at 60 degrees then the value of the cosine is 0.5 and the corresponding color from the texture map is white.
The texture map can have any number of color gradations in it, this is what makes this method of cel shading flexible. This is demostrated by loading different shade tables in the Loony program. There are further factors set in OpenGL that enhance the cel shaded look.
The Outline
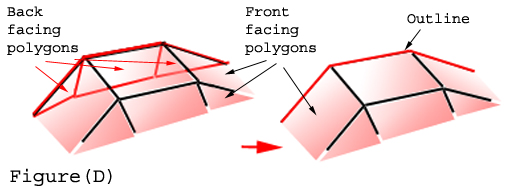
The Outline is drawn as a thick line for edges of back facing polygons which share edges with front facing polygons as Figure (D) illustrates. To do this we first draw the edges of all back facing polygons outlined in red in Figure (D), then we basically mask (erase) all the edges that we just drew that are under the front facing polygons, and if the width of the line with which we drew the edges was thick enough, then the outline will show through. Out of all the edges in that picture, only the red one would be drawn. It's a trick more than anything else.
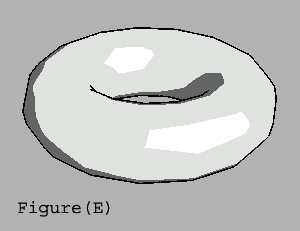
Figure (E) shows the cel shaded donut from the Loony program.
That's it.
Corrections, comments, and questions are welcome.

FastCounter by bCentral
©2002 Konstantin Khanyants |